


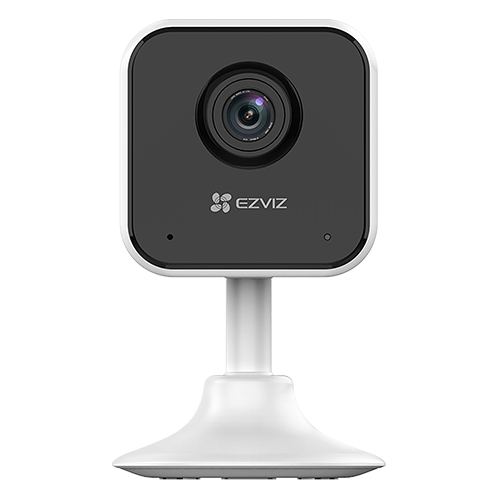


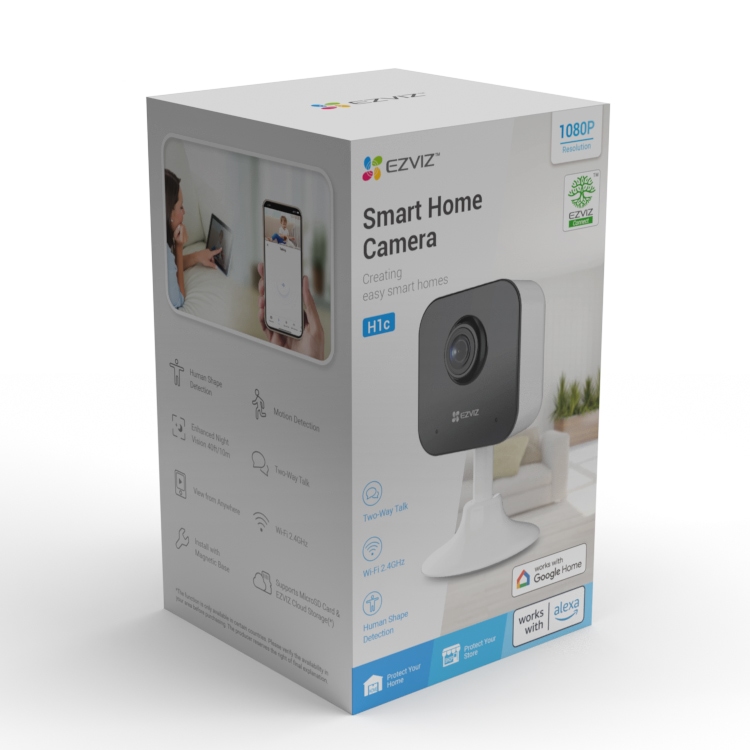
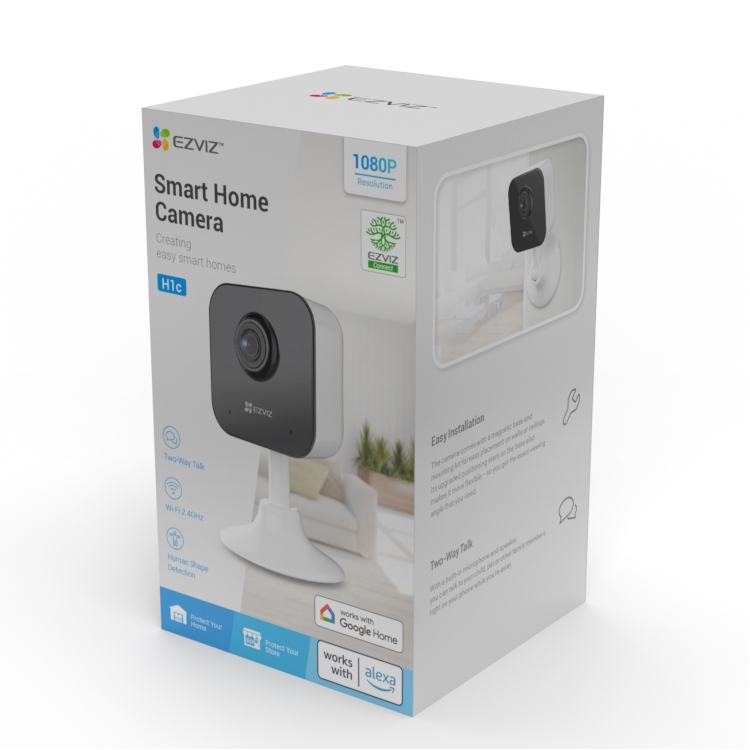
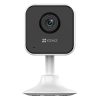

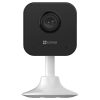
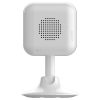

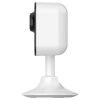
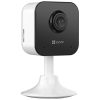

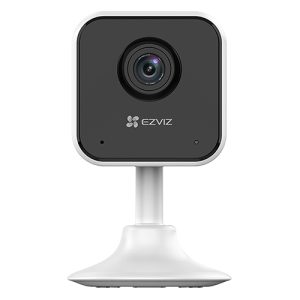
EZVIZ H1C Smart Home Wi-Fi Indoor Camera
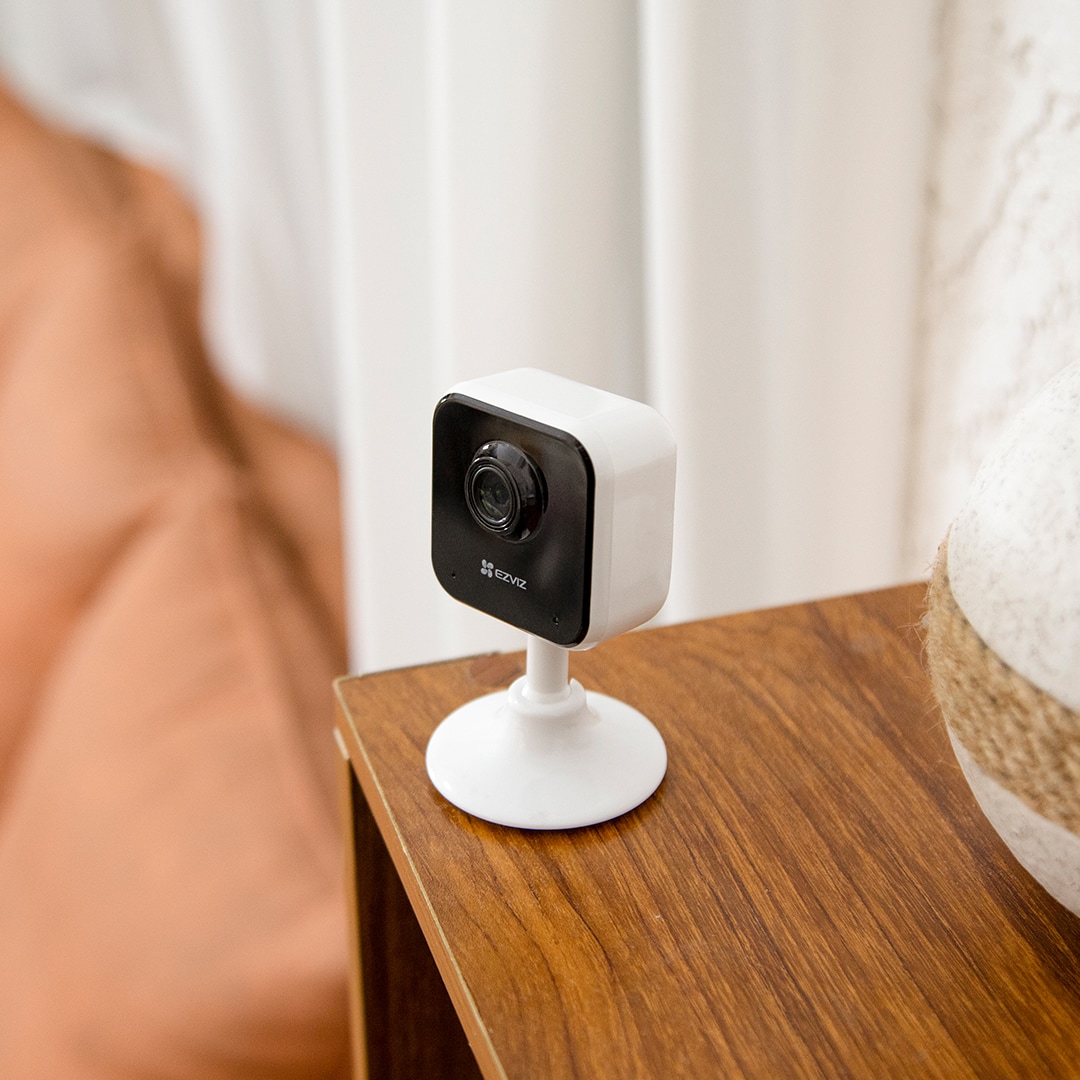
The H1C is a compact indoor camera ideal for monitoring children and pets, offering daytime and nighttime home security, motion detection, two-way audio, night vision, excellent video quality, and easy installation.
£29.99 inc VAT
Accessories
Compatibility
EZVIZ H1C Smart Home Wi-Fi Indoor Camera is compatible with the following systems:
![]()
![]()
EAN / Barcode: 6941545616407
Description
H1C Smart Home Wi-Fi Indoor Camera – Offering peace of mind in a small, convenient package.
The H1C is a simple yet dependable indoor camera that may be your go-to tool for monitoring your children and pets and providing daytime and nighttime home security. The camera’s small size and plug-in design allow it to be used in any room in the house. It has motion detection, two-way audio, crisp night vision, excellent video quality, and additional conveniences including sleep mode, three sound-alert settings, and an easy-to-install design.
Key Features
- 1080p Resolution
- 108° Wide-Angle Lens
- IR Night Vision Up to 10m (32ft)
- Motion Detection
- Three Sound-Alert Modes
- Sleep Mode for Privacy Protection
- Two-Way Talk
- Install with Magnetic Base
- Smart Integration with Google Assistant & Amazon Alexa1
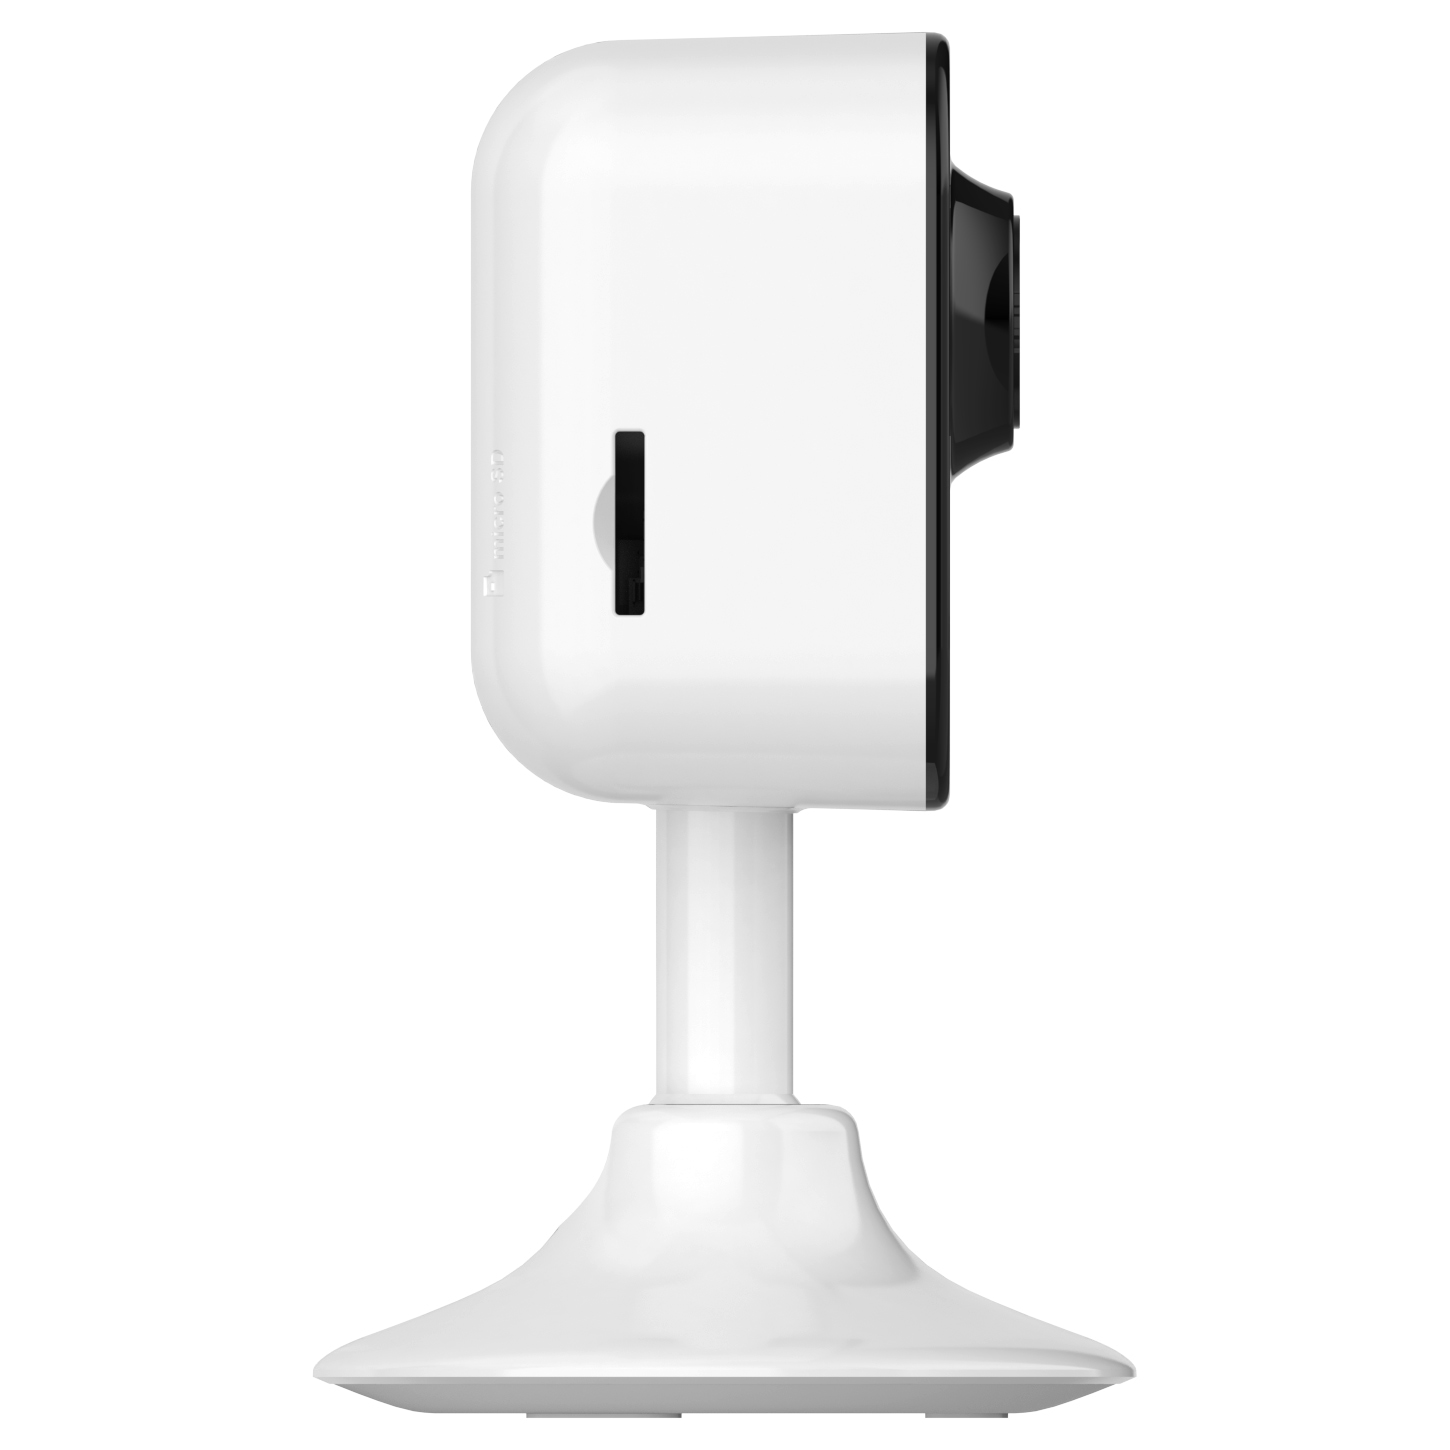
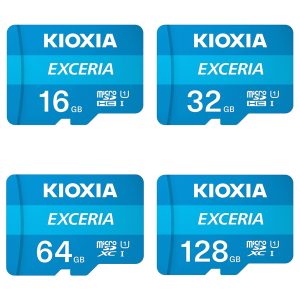
- Supports MicroSD Card (Up to 512 GB) & EZVIZ CloudPlay Storage2
- Google Assistant isn’t accessible in some languages and countries.
- Cards for local storage must be bought individually. Only a few markets provide cloud storage services. Before making any purchases, please confirm availability.
Manuals and Guides
Frequently Asked Questions
What should I do if I can't initialise the SD card?
Here are some troubleshooting tips to help you if you run into issues when attempting to initialise the SD card using the EZVIZ APP.
- Verify that the EZVIZ APP and your camera’s firmware are both up to date.
- Verify that the SD card has a UHS-1 rating or is class 10. For SD cards with capacities less than 64GB, the file type should be FAT32; for those with capacities greater than 64GB, it should be exFAT.
- Turn off your camera, take out and put back in the SD card, turn the camera back on, and then initialise the card once more using the EZVIZ app.
- You can try using a different SD card or installing the problematic card on another EZVIZ device to further rule out the SD card issue.
- Holding down the Reset button to attempt to factory reset your camera. This will restore the device to its original factory settings and may fix small problems.
How can I handle the "Device is offline" system message?
1. Check the indicator light status:
– A solid blue or slowly flashing blue light means the camera might reconnect soon. Refresh the home page on the EZVIZ APP to see if it comes back online.
– A slowly flashing red light suggests connectivity issues. Try the following:
1) Restart your router to address potential signal problems.
2) Unplug the camera, wait 10-30 seconds, then plug it back in and check if it reconnects.
2. Reconfigure the camera if it’s still offline:
– Ensure your smartphone is connected to a 2.4GHz Wi-Fi network if your camera only supports that frequency.
– Open the EZVIZ APP, go to Device Settings by tapping the three-dot icon, then select Wi-Fi settings.
– Press and hold the reset button on the camera for a few seconds.
– Wait for the indicator light to flash blue quickly, then proceed with the setup by tapping Next.
– Verify your Wi-Fi credentials, then connect to the device AP.
– Wait for the configuration to complete—your camera should be online again.
How can I proceed if I can't remember my EZVIZ device verification code?
For most EZVIZ devices, there are three main ways to obtain the six-letter device code:
1. Check the device label:
– Models like BC1 and HB3 kit have their default password on a white sticker on the base station.
– Models such as DB2 and DB2C kit have their default password on a white sticker on the chime.
– For DB1 models, remove the doorbell cover and scan the code using a third-party QR scanner.
– If your camera is connected to an NVR/DVR (e.g., X4 or X5), and was set up through direct addition, the password will be the admin/login password created during setup.
2. Check the manual cover:
– Some models have a QR code on the manual that contains device details. Use a third-party QR scanner to retrieve the code.
– If the manual cover states, “Scan the QR code for detailed manual,” it does not include device information.
3. Find it in the EZVIZ app:
– If you previously set up the device with your phone, access the Device QR Code or Verification Code via Settings > Device Info/About in the EZVIZ mobile app.
– If the camera is online, tap the eye-like icon, enter the OTP (one-time password) sent to your registered email or phone, and view the verification code upon confirmation.
If none of these methods work, do not delete your device from your account. Instead, contact EZVIZ support at account@ezviz.com or use the online chat feature via the chat window at the bottom right of the support page.
What happens if my password is forgotten?
- On the login screen, enter your correct account details and select the Forgot password? option.
- Click Send to proceed.
- Complete the verification step by either entering the code shown in the image or dragging the slider to solve the puzzle. Once verified, a 4-digit OTP code will be sent to your registered email or phone number.
- Enter the 4-digit code you received.
- Create a new password, then tap Save to finalize the process.
How may an offline device be reconfigured?
- Hold down the RESET button on your camera for 5-10 seconds to initiate the reset.
- Ensure your EZVIZ device is in Wi-Fi configuration mode.
- Launch the EZVIZ mobile app on your smartphone.
- On the app’s Home page, select the 3-dot icon next to your camera’s name to access Device Settings.
- Choose “Wi-Fi” or navigate to “Network Settings > Wi-Fi.”
- Follow the on-screen instructions in the EZVIZ app to complete the network setup.
If my camera keeps going offline, what should I do?
- Ensure both the firmware and EZVIZ app are updated to the latest version.
- Check your Wi-Fi signal strength by connecting your phone to the same network as your camera. In the EZVIZ app, go to More > Settings > Device Network Tools > Check WiFi signal.
- If the signal is weak, move the camera closer to your router and reduce interference from walls, elevators, microwaves, washing machines, and Bluetooth devices.
- If your router has an adjustable antenna, try positioning it in different directions.
- Change the Wi-Fi channel to one that is less congested.
- Disconnect unused devices from your router to free up bandwidth.
- If your camera supports an Ethernet connection, try using a cable for a more stable connection.
- If you own multiple EZVIZ devices and one is functioning properly, swap their locations to help diagnose the issue.
When the Wi-Fi connection drops out when connecting a device, what should I do?
- Ensure your Wi-Fi router is functioning properly. You can check this in the EZVIZ mobile app by selecting “Network Testing” on the configuration failure page or by turning off mobile data and connecting only to Wi-Fi to see if your phone can access the internet.
- If your EZVIZ device only supports 2.4G Wi-Fi, make sure your mobile phone is connected to a 2.4G network before configuring the device.
- Verify that your Wi-Fi signal strength is sufficient. Most EZVIZ devices work best when the upload speed exceeds 2 Mbps per camera. You can check this in the EZVIZ app under Profile Photo > Settings > Device Network Tools > Check Wi-Fi Signal.
- If the signal is weak, follow these steps to improve your network:
- Move the camera closer to your router and reduce interference from walls, elevators, microwaves, washing machines, and Bluetooth devices.
- If possible, disconnect rarely used devices from your router or restart the router.
- Switch your Wi-Fi channel to a less congested option.
- Review additional network settings that might help:
- Ensure DHCP is enabled on your router.
- Confirm IPv6 is turned off.
- Check that firewall settings (blacklist/whitelist) are disabled.
- If your camera supports an Ethernet connection, consider using a cable for a stable setup.
Alternatively, try connecting to a different home Wi-Fi network if available.
How can I fix the problem of Wi-Fi configuration failing?
- Verify that your router’s frequency band supports 2.4 GHz transmission if your device is limited to 2.4 GHz connectivity.
- Ensure your mobile phone is connected to Wi-Fi and that the network is active and working properly.
- Check your network settings:
- Confirm that your network does not have firewall restrictions or other limitations.
- Make sure your router is configured to assign IP addresses to devices or disable static IP settings (DHCP is enabled by default on all EZVIZ devices).
- Reset your camera, ensuring it is in ready mode or Wi-Fi configuration mode, then use the EZVIZ mobile app to set up the Wi-Fi connection.
Product Specifications
Physical and Performance Attributes | |
|---|---|
| Weight | 305 grams |


